Thứ Năm, 2 tháng 10, 2014

LewaOS for Samsung Galaxy Y GT-S5360

Hey guys! So I m finally back after my exams. Now back to work!
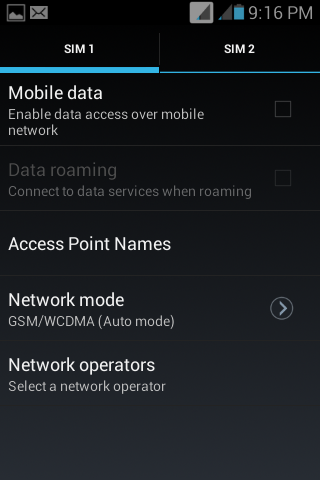
This post is about LewaOS which has been ported from Samsung Galaxy Ace. The ROM is stable which means it does not have any bugs. For all those who are not familiar with LewaOS - Lewa OS is a third-party Android ROM produced by a Chinese company Lewa Technology. It mainly focus on developing ROMs for 1000-reminbi-phone.As of April 2013,they have more than 2 million users,and as of July 2012,they are the Top 3 custom Android ROM in China,together with MIUI and DianXin OS(or called as Tapas OS).Lewa is also the first-ever custom Android ROM in the world that supports dual-SIM standby feature. 

Requirements:-

  1. A Samsung Galaxy Y with stock firmware
  2. LewaOS.zip from here
  3. CWM Recovery from here
  4. PercyCM Kernel from here

Installation Instructions:-

  1. Turn off your Galaxy Y and boot in recovery mode using the three button combination (volume up+home+power button)
  2. Now using the volume up/down keys to navigate select apply update from sd card
  3. Choose CWM Recovery.zip
  4. Now your Galaxy Y will boot in ClockWorkMod Recovery v5.0.28
  5. Go to mounts and storage and mount all partitions except sd-ext as it is not possible on the stock kernel
  6. Then select wipe data/factory reset and then wipe cache
  7. Now go to advanced and select wipe battery stats and wipe dalvik cache
  8. After all this is done go to apply update from sd card>choose zip from sd card>percy cm#2.zip
  9. Wait for the installation to complete and then go to advanced and select reboot recovery
  10. Your device will reboot in ClockWorkMod Recovery v5.0.26
  11. Now do everything from step 6-8 again
  12. Then go to apply update from sd card>choose zip from sd card>LewaOS.zip
  13. Wait for the installation to complete and then select reboot system now

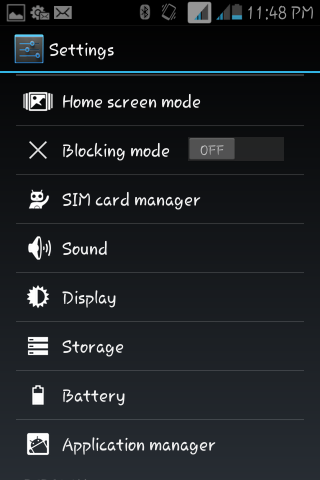
Screenshots:-


Posted by Manik Chhabra

Thứ Sáu, 5 tháng 9, 2014

Plasma Tweak for Samsung Galaxy Y GT-S5360

Hey guys! So this post is for all those who find their GT-S5360 slow. This script will drastically speed up your Galaxy Y. The best part is that this script is compatible with all the stock and custom roms but you have to make sure that your rom has init.d support.
 
 
Requirements:-
1) A rooted Galaxy Y with stock or custom rom with init.d support
2) A root browsing tool of your choice
3) Plasma Script from here
 
 
Installation instruction:-
1) Download the script and move it to the root of sd card
2) Using your Root browsing tool move the script file to /system/etc/init.d/
3) Change the permission of the script to rw-r-r (touch and hold on the script file for 3 seconds and then select permissions)
4) Reboot the device and feel the speed of the plasma script
 
So I have been and will be out of the blogging world for a month because I am preparing for my examinations but I will be back with new content on Galaxy Y in the first week of October.. Till then Bye!
Posted by Manik Chhabra

Thứ Sáu, 22 tháng 8, 2014

Website changes and new look

So as you all know, the website has been pretty much dead for the past 3-4 months due to my high inactivity and lack of new content such as roms, kernels and themes for the Galaxy Y GT-S5360. A big thanks goes to who has just recently started taking my place in posting new content for the Galaxy Y while I was away from the blogging world and I would like to mention that I will also begin making new posts and upload videos again for the last few roms and themes that were missed out.

The other news is that this website will now have support for the new Galaxy Young (S6310) model. You will see roms, kernels, themes, tutorials, tips and tricks posted for it as well as videos in the YouTube channel. Since the phone is very affordable and is not bad at all for its budget price, you could even consider upgrading to it if you are on a very tight budget.

Also, if you haven't noticed already, the website now has a new look. This was done so that all three archive projects can now have the same look. It is possible that you may encounter 404 error pages and small glitches in the first few hours until the new template is succesfully implemented to the blog.


Thứ Sáu, 15 tháng 8, 2014

Inspire Holo Version ROM for Samsung Galaxy Young Duos (GT-S6312)

If you are tired of the TouchWiz look on your Galaxy Young Duos, then you may want to try out something new. Something like this Inspire Holo version ROM developed by xda member vlc07.

As you can see in the screenshots below, the rom has been given the Holo look. Something like running an AOSP rom or CyanogenMod10 on your Galaxy Young. Not only does this rom offer you a different look, it also offers some additional features. For a list of all the features, read the list below.

Features:

  • Complete Holo themed
  • Stock 4.1 AOSP Trebuchet Launcher
  • CyanogenMod wallpapers
  • Rooted


  • Deodexed
  • Samsung Bloatware removed
  • Holo Calculator
  • Holo Calendar
  • No Statusbar SIM icons to take up space
  • Stock Android 4.1 AOSP experience
  • Customized boot animation

  • Screenshots:


    Download ROM - Click here.

    Installation:

    1. You must have CWM Recovery installed in order to flash this rom succesfully. If you still haven't done that, you may check out this post.
    2. Download the ROM to your sdcard.
    3. Power off your phone and boot into CWM Recovery.
    4. Choose wipe data/factory reset.
    5. Go to mounts and storage and mount /system if it is not mounted.
    6. Choose install zip.
    7. Choose choose zip from external sdcard.
    8. Choose the ROM zip file.
    9. Choose Yes to confirm when asked.
    10. After the installation is complete, go back and choose reboot system now.
    Source: xda

    Chủ Nhật, 3 tháng 8, 2014

    Solution to CWM Recovery v6.0.53 flashing error on Samsung Galaxy Y GT-S5360

    Hey guys! So almost all Cyanogenmod 11 users know that CWM Recovery v6.0.53 was released for flashing cyanogenmod 11 roms after 20140723 as it was necessary to format system to MTD system. But many got the error saying "This package is for totoro your device is GT-S5360" and then we finally get the error saying "Installation Aborted". So here is the solution to the problem.

    Instructions to solve problem:-

    1. Extract the CWM Recovery 6.0.53.zip
    2. Go to META-INF/com/google/android/
    3. Open the updater-script file using notepad in the folder
    4. Remove the following lines. These are the first 3 lines of the updater-script
    assert(getprop("ro.product.device") == "totoro" || getprop("ro.build.product") == "totoro" || abort("This package is for \"totoro\" devices; this is a \"" + getprop("ro.product.device") + "\"."););
         5.  Save the changes in updater-script
         6.  Now zip the folder
         7.  Transfer it to the root of your Sd Card
         8.  Boot in recovery mode and then flash the new CWM Recovery v6.0.53

    Posted by Manik Chhabra


      Thứ Năm, 31 tháng 7, 2014

      Kitkat Easter Egg for Samsung Galaxy Y GT-S5360

      Hey guys! So this mod is for all those who like Kitkat 4.4. Presenting kitkat Easter egg for any ROM on Galaxy Y. This mod will install the kitkat Easter egg on your Galaxy Y which can be seen by tapping on the Android version option in the settings.

      Requirements:-

      1. Kitkat Easter Egg App for LDPI from here
      2. Java Development kit from here
      3. Dex2Jar convertor from here
      4. A root browsing tool of your choice
      5. Framework.jar of your rom
      6. Platlogoactivity.class from here
      I have tried my best to make the installation easy so I hope nobody has problems installing the mod.

      Installation Instruction:-

      1. Using your root browsing tool copy the framework.jar of your rom from the /system/framework folder and paste it in the root of your sd card
      2. Connect your device using usb and transfer the framework.jar to your computer.
      3. Extract the framework.jar using Winrar or 7zip (classes.dex is the extracted file)
      4. Now extract dex2jar-0.0.9.15.zip
      5. Rename the folder to 123 and move it to the root of your C: drive
      6. Now move the classes.dex to the 123 folder in the root of C: drive
      7. Open the setclasspath.bat in the 123 folder. It would just flash for a second and would close then so dont go on trying to open it a 100 times 
      8. In the 123 folder, hold the shift key and press the left click button.
      9. You will find an option called "Open command prompt window here" select it
      10. A command prompt window will open with the text C:123
      11. In the command prompt window type the code "C:123>d2j-dex2jar.bat classes.dex"
      12. It would take some time and then you will see a folder called classes-dex2jar
      13. Open it and replace the platlogoactivity.class with the downloaded one in the folder com/android/internal/app
      14. After you have replaced it you now have to compile this folder back to the dex file
      15. Now open Command Prompt again using the same way above and type the code"C:123>path and type the path of your Java Development Kit. It would most probably be in the Java folder in the program files... For me its is C:123> path C:Program files/Java/jdk.5.0_77/bin
      16. Press the enter key and type the code "C:123> jar cf "classes.jar" android com javax
      17. Wait till the jar file is made
      18. After the jar file is made type the code "C:123>d2j-jar2dex.bat classes.jar"
      19. Now a file named classes-jar2dex.dex will be made. Rename it to classes.dex
      20. Open command prompt and then type the code "C:123> path (path of your java development kit as written above)
      21. Press the enter key and type the code "C:123> jar cf "framework.jar" classes.dex"
      22. Now transfer the kitkat easter egg app and the framework.jar to the root of your sd card
      23. Install kitkat easter egg app in your galaxy y
      24. Using your root browser replace the framework.jar in the /system/framework with the new one and change the permission to rw-r-r
      25. Reboot your device
      26. Go to settings>about phone>tap continuously on the android version
      And here are some screenshots of the mod:-


      Posted by Manik Chhabra


      Thứ Tư, 30 tháng 7, 2014

      Update for Samsung Galaxy Y GT-S5360 users with Cyanogenmod 11 KitKat

      Hey guys! As most of you know that Cyanogenmod 11 KitKat was released for Samsung Galaxy Y GT-S5360 a month ago with many bugs. But now Cyanogenmod 11 for our Galaxy Y is getting stable than ever. All the bugs have been fixed in the ROM except video recording, h/w decoders and some lags. So this post is for all those who are installing the ROM after version 20140723. All the people who had flashed the ROM after the version 20140723 would have the got the "Installation Aborted" error. This is because all the Cyanogenmod 11 releases after this version are switched over to the MTD flash drivers. So in order to flash these ROM's you would require CWM Recovery v6.0.53.

      Requirements:-

      1. A rooted Galaxy Y GT-S5360 with stock rom
      2. CWM Recovery.zip from here
      3. CWM Recovery v6.0.53.zip from here

      Installation Instructions:-

      1. Turn off your Galaxy Y and boot in recovery mode by pressing the three button combination (volume up+home button+power button)
      2. Using the volume up/down keys select apply update from SD Card
      3. Now select CWM Recovery.zip
      4. Now you would be in CWM Recovery v5.0.28
      5. Go to mounts and storage and mount all partitions
      6. Select install zip from sd card>choose zip from sd card>CWM Recovery v6.0.53.zip
      7. Wait for the installation to complete
      8. Now go to advanced and then select reboot recovery
      9. Now you device will reboot in CWM Recovery v6.0.53
      10. This is the most important step. Go to mounts and storage and then select format system. This will change your system to MTD.
      11. Now press the back button and select wipe data and then wipe cache partitions
      12. Now follow all steps from here

      I would always add my phone number on my posts so that anybody who had problems can contact me but I had to remove it from all my posts because of some prank callers.

      Posted by Manik Chhabra

      Thứ Bảy, 26 tháng 7, 2014

      How to unroot/unbrick Samsung Galaxy Young (GT-S6310/GT-S6312)

      With each custom rom, kernel and theme that you attempt to flash onto your phone, there is always the danger of bricking it. A bricked phone technically means that it turns into a non-functional state. In such case, after powering on your phone after an unsuccesful flash, you get stuck in seeing either an infinite bootloop of your boot animation or just the Samsung Galaxy Young logo. This is what we call a soft brick. Unfortunately, the process in recovering a hard bricked Galaxy Young is not the same. A hard brick means that your phone will not power on regardless of any key combinations you try to press.

      If you have flashed a custom rom for the first time and ended up bricking your phone, you can easily restore it back to its normal state thanks to tools such as Odin that can get you out of this mess. This post will show you how to do this in case you get stuck in this frustrating situation.

      Pre-requisites:

      How to unroot/unbrick Galaxy Young (GT-S6310/GT-S6312):

      1. Head into the SamMobile firmware portal as mentioned in the pre-requisites and register for an account. Then in the firmware search bar search for GT-S6310 or GT-S6312 (S6310 is the regular variant and the S6312 is the Duos variant).
      2. If possible, download the firmware that is meant for your country. It's okay to download another country's firmware if there is none available for yours.
      3. After the download is complete, extract the firmware zip file and you should get a .tar.md5 file and a .dll file.
      4. Now extract the Odin 3.07 zip file that you have downloaded and run the Odin program. Also, do not enable/disable any of the options in Odin, especially not Re-partition! Leave them all as they are by default.
      5. Power off your Galaxy Young
      6. While the phone is powered off, begin holding the Volume down + Home + Power buttons together to boot into Download mode. Once you have booted into Download mode, press the Volume up button to have it say "Downloading..." on your phone's screen.
      7. Now connect it to your computer and check the Odin program to see if it will recognize it in one of the ID:COM boxes. If it doesn't, you need to try and re-install the Samsung USB Drivers.
      8. Once your phone is connected and Odin recognizes it, click on the PDA button and choose the .tar.md5 that you got when you extracted the firmware zip file.
      9. Now click on Start and wait for the process to complete.
      10. After it is done, your phone should automatically reboot and start up normally. In case you are still stuck on a bootloop, take off the battery, place it back in and hold the Volume up + Home + Power buttons together to boot into Recovery mode and perform a data wipe.

       
      If you are having a hard time following the text instructions, you may watch the demo video above that shows you step by step in recovering your phone.

      Thứ Sáu, 25 tháng 7, 2014

      How to Root and Install CWM Recovery on Galaxy Young (GT-S6310/GT-S6312)

      Those of you who wish to root your new Galaxy Young (GT-S6310 or GT-S6312) can now easily do it thanks to xda member Djalo96 who has built a compatible CWM Recovery v6. For those of you who might be new to all of this, CWM Recovery will help you to install custom roms on your phone and rooting will basically unlock full access to your phone.

      After rooting, you can do things such as delete unwanted pre-installed apps (bloatware), run apps such as Titanium Backup to backup your apps and their data and many more.
      The CWM Recovery build used in this post is working for both regular and duos variant Galaxy Young.

      Pre-requisites:

      Odin 3.07 - Click here to download.
      CWM Recovery - Click here to download.
      Samsung USB Drivers - A simple installation of Samsung Kies software should take care of that.

      Rooting and installing CWM Recovery:

      1. Download the CWM Recovery file to your computer which is named "recovery.tar.md5.zip"
      2. Extract the zip file using a program such as WinRAR or 7zip. After extracting, you should have a file named "recovery.tar.md5"
      3. Now download Odin 3.07.zip file to your computer and extract it as well.
      4. Power off your Galaxy Young and then power it back on by holding the Volume down + Home + Power buttons together.
      5. You should then boot into Download mode. Now press the Volume up button to have your phone ready to download. To be sure that you have done that, see if it says "Downloading..."
      6. Run the Odin program and connect your Galaxy Young to your computer.
      7. Click on the PDA button and choose the recovery.tar.md5 file.
      8. Click the Start button and Odin should begin transferring CWM Recovery to your phone.
      9. IMMEDIATELY, after the transfer is complete and your phone's screen goes off, hold the Volume up and Home buttons together.
      10. You should now be in CWM Recovery. Do not select anything but reboot system now.
      11. It should ask you if you want it to root your phone, so choose Yes.
      12. After your phone reboots, open the Play Store and download either Superuser or SuperSU.
      If you are having a hard time following the text tutorial, you may watch this video demonstration of how to do all of this.


      Source: xda

      Thứ Tư, 23 tháng 7, 2014

      Aroma Zip maker for Samsung Galaxy Y GT-S5360[Very Easy]

      Hey guys! So most of you would be familiar with the aroma installer and some of you would love to have it in your update/theme/custom ROM or any other flashable zip file. Today I am going to show you all how to add aroma installer to your zip file.

      Requirements:

      1. A Samsung Galaxy Y GT-S5360
      2. A PC with Winrar or 7zip
      3. Aroma zip maker from here 
      4. META-INF of your flashable zip

        Installation Instructions:

        1. Extract the contents of the aroma zip maker.zip
        2. Now place the META-INF of your zip file in the extracted folder
        3. Open aroma zip maker.exe and a command prompt window will open
        4. It will show an animation. Wait till it completes
        5. Now it would say press any key so press any key of your choice
        6. After that you will see a 3 options.
        7. Press 1 and then press the enter key
        8. It will take 1 or 2 seconds to complete
        9. Now open the aroma zip maker folder and you will see 2 folders there. The name of one folder would be META-INF and the other would be Original META-INF
        10. Copy the META-INF and paste it in your flashable zip file. The Original META-INF is your original folder without the aroma installer so in case you want to remove the aroma installer rename the Original META-INF to META-INF and paste in the flashable zip file
        11. Now flash your zip file in clockworkmod recovery and see the new aroma installer!
        12. If you want to make another aroma zip delete the aroma zip maker folder and extract the contents of aroma zip maker.zip again


        Posted by Manik Chhabra

        Thứ Ba, 22 tháng 7, 2014

        GetuX Touch Recovery for Samsung Galaxy Y GT-S5360

        Those of you who are aware of custom recoveries may already know about the CWM (ClockworkMod) recovery and its advanced options (something that the stock recovery does not offer). If you are constantly flashing roms and themes on your Galaxy Y you've probably gotten irritated at times with the constant use of the hardware keys to navigate through options to perform your tasks such as wiping data, creating/restoring a nandroid backup and so on.

        This is where the GetuX Touch Recovery comes for help, based off CWM v5.0.2.8 and built by xda member cleverior.ipul. With this particular recovery, you can actually use your touchscreen to navigate through the options instead of pressing the hardware keys. Plus, it offers a very simple UI.

        touch recovery galaxy y

        Download Getux Touch Recovery - Click here.

        Installation:

        1. Download the zip file to your sdcard
        2. Boot into Recovery mode by holding Volume up + Home + Power buttons
        3. Flash the zip file
        4. Choose GetuX_Touch_Recovery_v1B_[TOTORO].zip
        5. You should now be on the GetuX Touch Recovery. Enjoy.
        Also please do keep in mind that this is a temporary recovery meaning that in order to use it, you will always have to flash it through your old recovery first, so don't delete the zip file from your sdcard.

        Source: xda

        Cyanmobile Expeience 2.3.8 for Samsung Galaxy Y GT-S5360

        Hey guys! Presenting the best rom for galaxy y. It is called Cyanmobile Experience which installs original android 2.3.8 on your device. The rom does have any bugs (except usb tethering and fm radio) which mean it is stable. For all those who are not familiar with cyanmobile roms – It is an aftermarket rom like CyanogenMod, MIUI, JoyOS, LewaOS and many others.

        Requirements:

        1. A rooted Galaxy Y with stock rom
        2. CWM Recovery from here
        3. Cyanmobile Experience 2.3.8 from here
        4. Percy cm#2 kernel from here
        5. Bieltv3’s v4 kernel from here
        6. Google Apps from here

        Installation Instructions:

        1. Turn off your device
        2. Wait till it vibrates and then boot in the recovery mode by pressing the three button combination (Volume up + home + power button)
        3. Now using the volume up/down select apply update from sd card
        4. Select CWM Recovery.zip
        5. Your device will boot in ClockWorkMod Recovery v5.0.28
        6. Now go to mounts and storage and mount all partitions
        7. After mounting all partitions go to install zip from sd card>choose zip from sd card>Percy cm#2.zip
        8. Wait till the installation completes
        9. Now go advanced and then select reboot recovery
        10. Your device will reboot in ClockWorkMod Recovery 5.0.26
        11. The recovery mode will most probably show a number of errors. Go to mounts and storage and format all partitions except sd card and then mount all of them
        12. Again select install zip from sd card>choose zip from sd card>Cyanmobile Experience 2.3.8
        13. Wait till the installation completes
        14. Now again go to advanced and select reboot recovery
        15. Your device will reboot in ClockWorkMod Recovery 5.0.26
        16. Now go to mounts and storage again and mount all partitions
        17. After this go to install zip from sd card>choose zip from sd card>kernel_CM7_v4.0_totoro.zip
        18. Wait for the installation to complete and then select reboot system now
        19. The first boot will take time (approximately 4 minutes ) so please be patient
        20. You finally have Cyanmobile Experience Android 2.3.8 on your Galaxy Y
        21.      Now turn off your device again and boot in CWM Recovery
        22.      Go to mounts and storage and mount all partitions
        23.      Go to install zip from sd card>choose zip from sd card>google apps.zip

        Here are some screenshots of the great rom:


        Posted by Manik Chhabra

        Thứ Sáu, 18 tháng 7, 2014

        Finally Cyanogenmod 9.2 Beta 5 for Galaxy Y GT-S5360 is out!

        After a long wait of three months we finally can get the most stable cyanogenmod 9.2 on our galaxy Y GT-S5360. This version has many bug fixes.

        The list of the bug fixes in Cyanogenmod 9.2 are:

        • Re-newed device tree from scratch
        • Optimized libgralloc and libhwcomposer
        • Fixed laggy bootanimation
        • Completly removed artifacts on screen due to bad HW drivers
        • Finally improved and fixed whole HW system
        • Imporved Nexus S audio libs
        • Fixed microphone
        • New liblight lib open source - future support of BLN
        • New camera library based on QCOM msm7x27 devices
        • Camera preview working
        • Camera pictures working too on native camera app
        • Added all propietary necessary camera libs
        • Panorama mode also working
        • New binary for get_macaddrs and patched libbrcm_ril.so
        • New WIFI configurations
        • FIxed WIFI signal bars
        • Fixed GPS, need more tests
        • Stop using old Bluetooth system, and swithced to CM9
        • Renewed and swithced to AOSP open offline charging
        • Vold now built from source, and faster media scanning
        • Fix battery capacity of some devices, and imrporved battery stats
        • Init and adb binaried built from source
        • Fixed whole adb system (adb shell, su)
        • Force adb to work on the first boot without debug options
        • CWM6 built from ICS source and integrated on kernel build
        • New kernel worked from 0 for all three devices
        • New ramdisk full compatible with CM9 and built from source
        • Common kernel is present on this build
        • Switched to Alcatel libv3d kernel drivers
        • Adapted cooperve camera drivers to common kernel 
        • New recovery.fstab partitiont table


        Requirements:

        1. A rooted Samsung Galaxy Y GT-S5360 with stock rom
        2. EXT Formatting tool from here
        3. ClockWorkMod Recovery from here
        4. Required kernel for Cyanogenmod 9 from here
        5. Cyanogenmod 9.2 Beta 5 from here
        6. Google Apps from here

        Installation Instructions:

        1. Turn off your device and wait till it vibrates.
        2. After it vibrates enter the recovery mode by pressing the three button combination (volume up+home+power button)
        3. Using the volume up/down keys select apply update from sd card and select CWM Recovery.zip
        4. Now go to mounts and storage mount all partitions except sd-ext (mount system, data, cache, sd card)
        5. After you mount all partitions go to install zip from sd card and then select choose zip from sd card
        6. Select ext_formatter.zip and wait till the installation completes.
        7. Now go advanced and then select reboot recovery
        8. Again select CWM Recovery.zip
        9. Now install zip from sd card and then choose zip from sd card
        10. Select kernel_CM7_v4.0_totoro.zip
        11. Wait till the install completes and then go to advanced>reboot recovery
        12. The device will automatically reboot in CWM Recovery
        13. Now again to mounts and storage and format all partitions except sd card and sd-ext (format system, data and cache)
        14. Again mount all partitions
        15. Then press the back button and select wipe data/factory reset
        16. After the factory reset is done go to install zip from sd card>choose zip from sd card> CM9_totoro_Beta_05.zip
        17. Wait till the installation completes and then select reboot system now.
        18. The first boot will take some time (approximately 3 minutes) but please be patient
        19. You finally have Cyanogenmod 9.2 Android 4.0.4 Ice Cream Sandwich on your Galaxy Y GT-S5360.

        Installation of Google Apps:

        1. Boot the device in CWM Recovery
        2. Mount all partitions in mounts and storage
        3. Select install zip from sd card>choose zip from sd card> google apps.zip

        Posted by Manik Chhabra

        Thứ Sáu, 11 tháng 7, 2014

        Increasing the internal memory of Samsung Galaxy Y GT-S5360 (not Link2sd)[Updated with Screenshot]

        Hey guys! As we all know that the internal memory of galaxy y (190mb) is so less that you cannot install many apps on the device. So today I will tell you all how to increase the internal memory of galaxy y. This script is know as Amurallz Script and is working only on two kernels :- Hell's Fusion #50 and Percy cm#2(I have tested percy cm#2 kernel so i would recommend this). Many roms are compatible with this script but some are not so I would recommend that you make a nandroid backup before installing this script. I have tested that the script is working on evolution x4, cyanocream v4 and repencies rom. You are free to test this in your custom rom or you can ask me to do it in the comments and I will reply as soon as i test it.


        Requirements:

        1. A rooted Samsung Galaxy Y with Busybox installed
        2. Minimum 8gb sd card
        3. A backup of your sd card in your pc as when you partition the sd card, it will be formatted
        4. CWM Recovery from here
        5. ext-s.zip from here
        6. Hell's Fusion #50.zip from here or Percy cm#2.zip from here

        Instructions:

        1. Turn off your device and wait till it vibrates.
        2. Boot into recovery mode by pressing the three button combination (volume up+home+power button)
        3. Now use the volume up/down keys to move up or down and select apply update from sd card
        4. Choose the kernel of your choice Hell's Fusion #50.zip or Percy cm#2.zip (recommended)
        5. Wait till the installation completes.
        6. Now go to advanced and select reboot recovery.
        7. It will reboot again and this time it will boot directly in ClockWorkMod recovery.
        8. Go to advanced > Partition sd card and select partition size as 512mb,1024mb or 2048mb only with swap size 0mb
        9. Wait till the partition is made.
        10. After the partition is complete paste the ext-s.zip into the root of your sd card.
        11. Now go to install zip from sd card>choose zip from sd card>ext-s.zip
        12. Reboot device
        13. After the device boots you can see an app called EXT Manager in the app drawer.
        14. Open it and select remove all methode ( it will ask for root permissions allow it)
        15. Wait for 10 seconds and your device will reboot automatically
        16. After the device reboots open the EXT manager again and this time select "Install Amarullz"
        17. Again wait for 10 seconds and the device will reboot automatically
        18. Now open titanium backup or the task manager and check your internal memory there.
        If your device has IMEI problem after installing this script, download the zip from here and flash it in CWM.


        Posted by Manik Chhabra

        Chủ Nhật, 29 tháng 6, 2014

        Cyanogenmod11 for Samsung Galaxy Y GT-S5360 released! [Updated with latest download links and screenshots]


        Hey guys! Today I will show you all how to install cyanogenmod 11 on Galaxy Y.


        So for all those who are not familiar with cyanogenmod based roms cyanogenmod is an open source operating system for smartphones . It is developed as free and open source based on the official android released by google.


        Requirements:-

        1. A Galaxy Y with stock rom
        2. CWM Recovery download it from here
        3. Kernel to be downloaded from here
        4. And finally Cyanogenmod 11 from here

        Installation Instructions:-
        1. Power off your galaxy Y and wait till it vibrates.
        2. After it vibrates boot it in the recovery mode by pressing the three button combination (volume up + home + power button)
        3. Then go to apply update from sd card and then choose CWM Recovery.zip
        4. Now to select install zip from sd card>choose zip from sd card>kernel Bangprovn#1.zip
        5. Wait till the installation completes and then go to advanced and then select reboot recovery.
        6. Now it would boot in CWM Recovery v6.0.49 and would show a number of errors. No need to worry
        7. Go to mounts and storage and format system, data and cache
        8. Now mount all partitions (system, data, cache, storage/sd card and sd-ext)
        9. Press the back button and select install zip>choose zip from storage/sd card
        10. Choose cm-11-20140719-unofficial-totoro.zip
        11. Wait till the installation completes and then select reboot system.
        12. The first boot will take time to complete
        13. Finally you have Kitkat Android 4.4.4 on your Galaxy Y.
           Most of the bugs in this rom have been fixed except some lags, video recorder and panorama mode

        And here are some screenshots of the rom:-


        Posted by Manik Chhabra